Guides & Calculators: Laying Floors and Tiles
Hands-on guides and free online calculators for floor and tile planning. Each article answers one concrete question and shows how to solve it in the tool – many with figures from our analysis of 500 rooms.
Topics
Four areas where the questions collect. Each leads to its own overview.
Laying & patterns: starting point, direction, bond
Starting point, direction, cut row and patterns – the decisions you make before the first tile.
12 articles→Rooms & floor plans: planning difficult situations
Period rooms, roof slopes, columns, open plans, small bathrooms: situations no formula captures.
9 articles→Material & waste: getting the quantities right
How much you really need: waste, format, joint width, offcuts, reserve and reordering.
10 articles→Terrace & outdoors: slabs, base, pedestals
Different rules outdoors: base, slope, joint width, slab quantities and support points.
5 articles→Laying & patterns: starting point, direction, bond
Starting point, direction, cut row and patterns – the decisions you make before the first tile.

How to plan a tile layout: from measurements to the first row
Plan a tile layout step by step: measure the room, set reference lines, check edge cuts, compare patterns, and order the right amount of material.
Read →
Half, third or quarter offset: which tile pattern works best?
Compare half, third and quarter offset patterns: understand appearance, lippage risk, edge cuts, and material waste before installation.
Read →
How to plan a laminate layout: rows, stagger and edge pieces
Plan laminate before laying: choose direction, size the first and last rows, stagger end joints, allow expansion gaps, and calculate packs.
Read →
Laying tiles: where do you start – centre or wall?
Centre or wall edge? The axis decides symmetry and material demand. Analysis of 500 rooms plus a live comparison of both starting points on the floor plan.
Read →Rooms & floor plans: planning difficult situations
Period rooms, roof slopes, columns, open plans, small bathrooms: situations no formula captures.

Import a floor plan from a photo: how to digitise your plan
Photograph a paper floor plan, screenshot or sketch, detect rooms automatically and turn it into an editable, scaled draft – explained step by step.
Read →
How to photograph a floor plan: 7 tips for accurate recognition
Straight perspective, readable dimensions and complete outlines: how to photograph or scan a floor plan so rooms and walls can be detected reliably.
Read →
Out-of-square rooms: how to measure when nothing is at a right angle
Measure a room without right angles using diagonals and triangulation, draw skewed walls correctly, and calculate flooring materials accurately.
Read →
Attic slopes: planning laminate under the roof pitch
Plan laminate in an attic room, including laying direction, knee-wall recesses, expansion gaps, and edges below the roof pitch.
Read →Material & waste: getting the quantities right
How much you really need: waste, format, joint width, offcuts, reserve and reordering.

The 10% rule is wrong: 500 rooms analysed
We ran 500 floor plans through our laying engine. Result: real material surplus ranges from under 2% to over 58%. Method, tables and raw data to download.
Read →
Large or small format: which creates less waste?
Eight formats, 500 rooms, the same room per run: 20×20 gets by with a median surplus of 0.3%, 60×120 needs 17.4%. The full comparison table.
Read →
Reusing offcuts: when it pays off and when it does not
Offcuts save a median of 5.5 percentage points of material – but exactly zero tiles in 143 of 500 rooms. When sorting and re-cutting actually pays off.
Read →
Calculate offcuts when laying tiles
Calculate offcuts and waste when laying floors: count cuts individually, derive waste in m² and total demand including reserve transparently.
Read →Terrace & outdoors: slabs, base, pedestals
Different rules outdoors: base, slope, joint width, slab quantities and support points.

How many pedestals do you need per paving slab?
Count paving pedestals correctly: shared supports, edge and corner pedestals, extra supports for large slabs, and a sensible ordering reserve.
Read →
Planning a pedestal rail system: spacing, direction and materials
Plan aluminium rails on pedestals correctly: calculate rail and support spacing, perimeter support, cutouts, profile pieces and connectors.
Read →
Pedestals or a rail system for terrace slabs?
Compare point support and rail construction: when classic pedestals are enough, when line support helps and which manufacturer specifications decide.
Read →
Laying terrace slabs: gravel, pedestals or mortar?
Gravel bed, pedestals or drainage mortar: which installation fits your terrace – plus planning slope, joint width and edging correctly.
Read →This is what it looks like planned out
Real projects in the same view your clients get: floor plan, laying plan and material list – no account, no installation.

Terrace on pedestals
L-shaped terrace with a planting bed cut out: slab grid, slope and every support point – including the pedestal parts list.
- 20.78 m² · 60 × 60 · 4 mm joint
- 79 slabs incl. 8% reserve
- 97 pedestals · 1.5% slope

Three-room flat, one grid
Six rooms, eleven walls, five doorways – and a single herringbone grid running through every opening. Material is calculated for the whole flat at once.
- 63.79 m² across 6 rooms
- 90 × 30 herringbone, one grid
- 334 planks · 199 cuts

Small bathroom with tub and stud wall
Under 3 m² of floor left, but two cutouts: this room produces more cut tiles than full ones – exactly where the m² rule of thumb fails.
- 2.82 m² · 30 × 60 · 2 mm joint
- 9 full tiles, 22 cuts
- 35 tiles incl. 10% reserve

Herringbone in the living room
A rectangular room with herringbone at 45°: you can see where the centre axis sits and how the border cuts run out symmetrically all around.
- 21.84 m² · 60 × 30 herringbone
- 84 full planks, 64 cuts
- 5.01 m² waste · 12% reserve

Attic room with a slope
A five-sided outline instead of length × width: the slope is drawn as a real edge and the planks run lengthwise – every cut along the slope counted individually.
- 14.71 m² with an angled edge
- 128 × 19 cm plank, laid lengthwise
- 87 planks · 11 packs

Format comparison: 60 × 60 vs 30 × 60
Two identically sized rooms side by side, only the format differs – each with its own row in the material table. Here the smaller format needs more material, because room dimensions decide, not tile size alone.
- 2 × 13.49 m² · 8% reserve
- 60 × 60 → 46 tiles = 16.6 m²
- 30 × 60 → 98 tiles = 17.6 m²

Reusing offcuts
A utility room where 24 full tiles meet 24 cuts. Switch on offcut reuse in the tool and 10 of the 48 tiles disappear.
- 10.73 m² · 60 × 60 · 3 mm joint
- 24 full tiles, 24 cuts
- With offcut reuse in the tool: −10 tiles
Opens the read-only client view of a share – the same one you create for your own projects with Premium.
Calculators
Calculate quantities, waste and material directly on the floor plan.
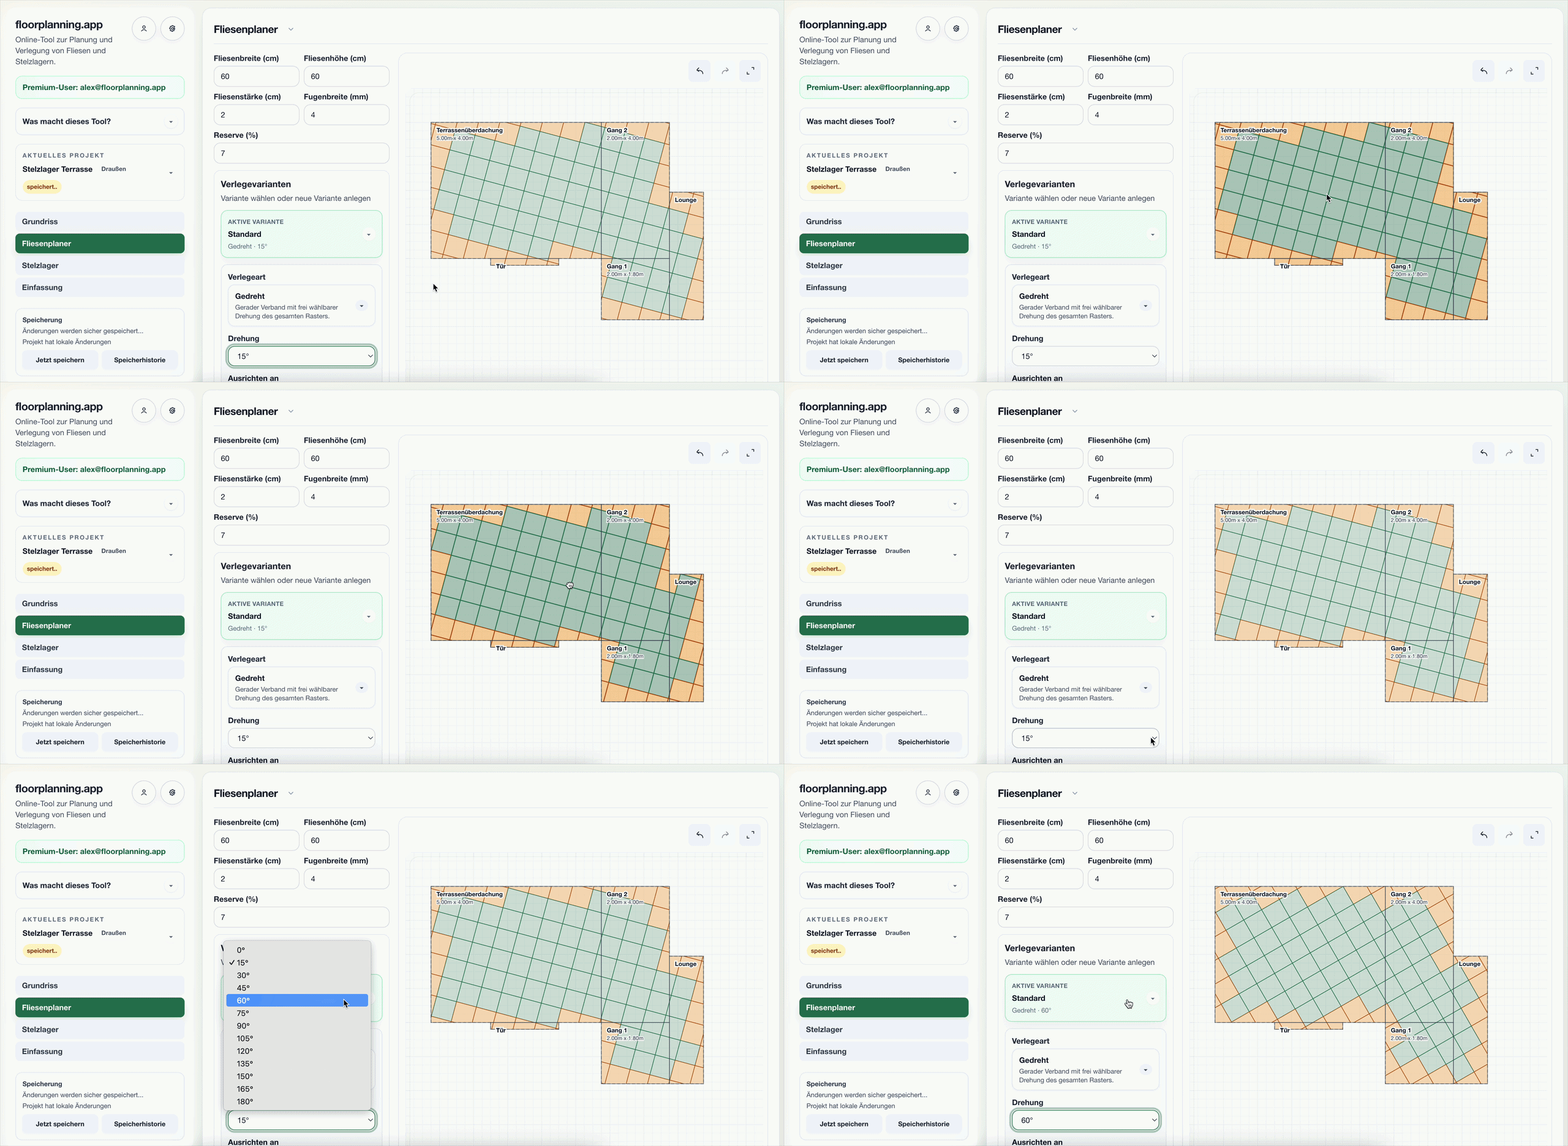
Tile Pattern Calculator
Compare tile patterns on your floor plan. Test straight, diagonal, and herringbone layouts and check quantities, cuts, and waste for each.
Open →
Tile Waste Calculator
Calculate tile waste from room shape, tile size, and laying direction. Compare optimized layouts and reduce the amount of material you need.
Open →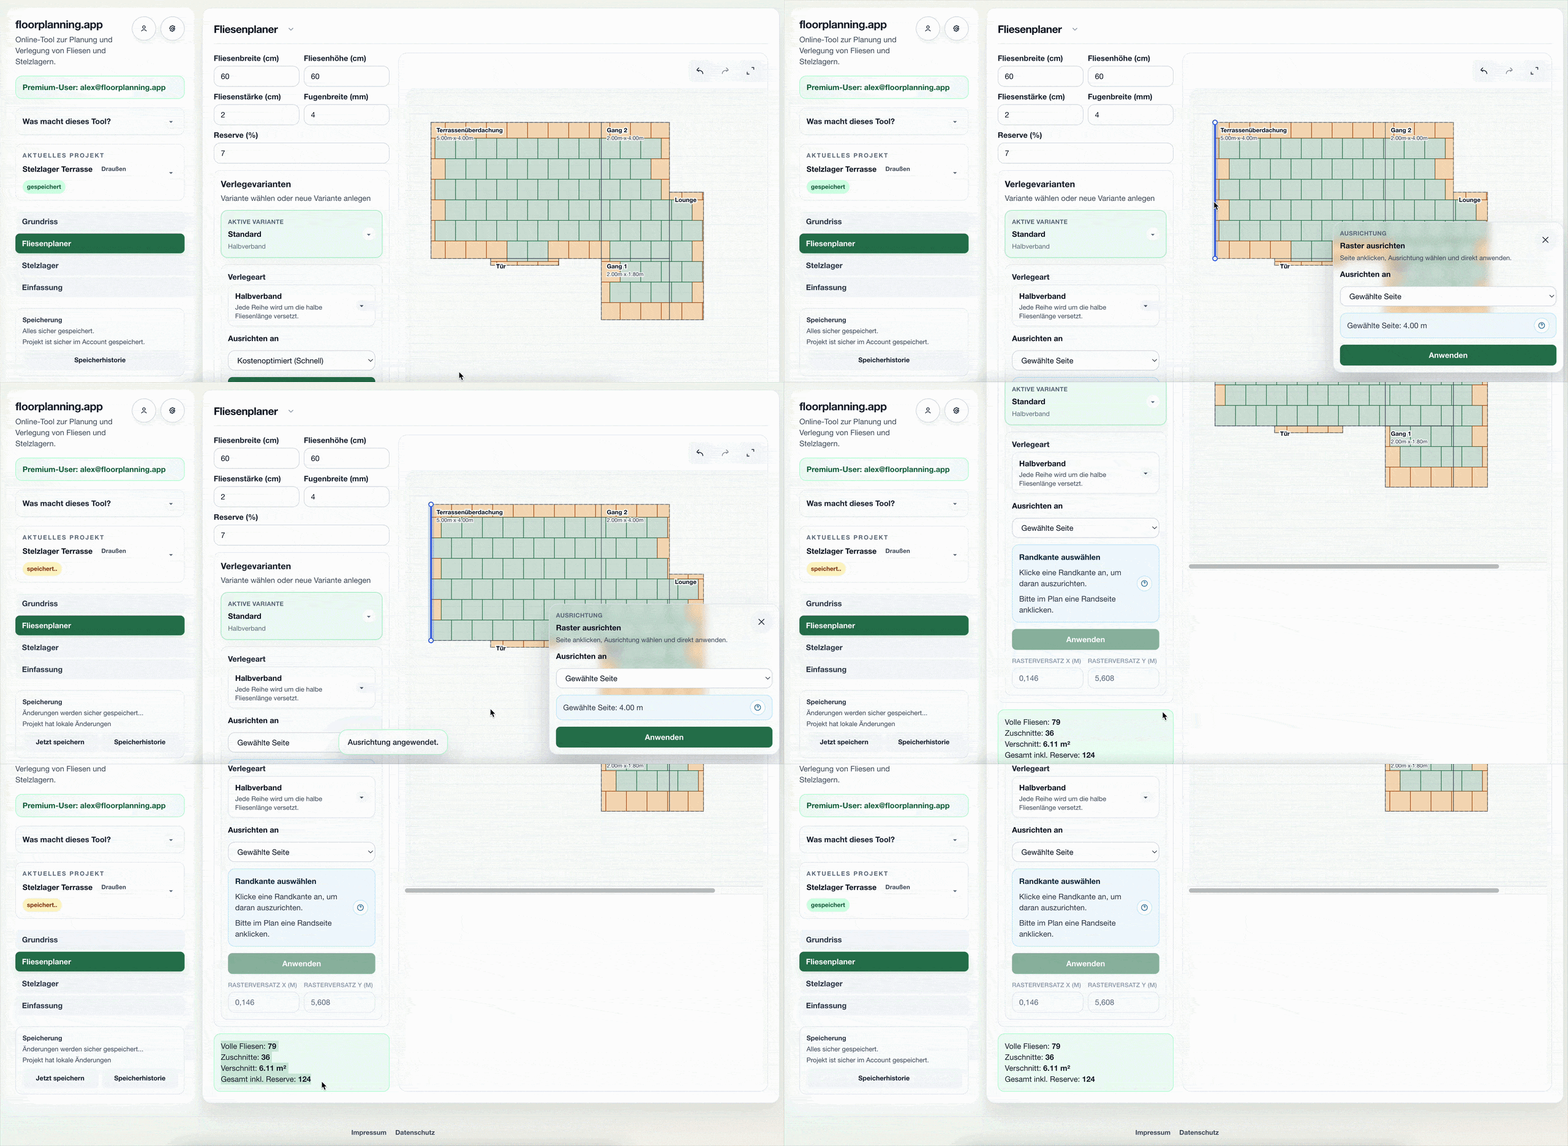
Tile Material Calculator
Calculate tile quantities accurately, including full tiles, cuts, waste, and reserve, and get a reliable material list for purchasing.
Open →
Laminate Calculator
Calculate laminate and vinyl online. Enter room and plank dimensions, compare laying directions, and get quantities including waste and reserve.
Open →
Terrace Tile Calculator
Plan terrace tiles on your floor plan, compare layouts, and calculate material needs accurately, including cuts, waste, and reserve.
Open →
Pedestal Calculator
Calculate pedestals for terrace slabs online. Plan supports at corners, edges, and within the field, then get a reliable material quantity.
Open →Save your plan for free
Create your account, then plan patterns, quantities and waste directly on your floor plan.