Offset pattern guide
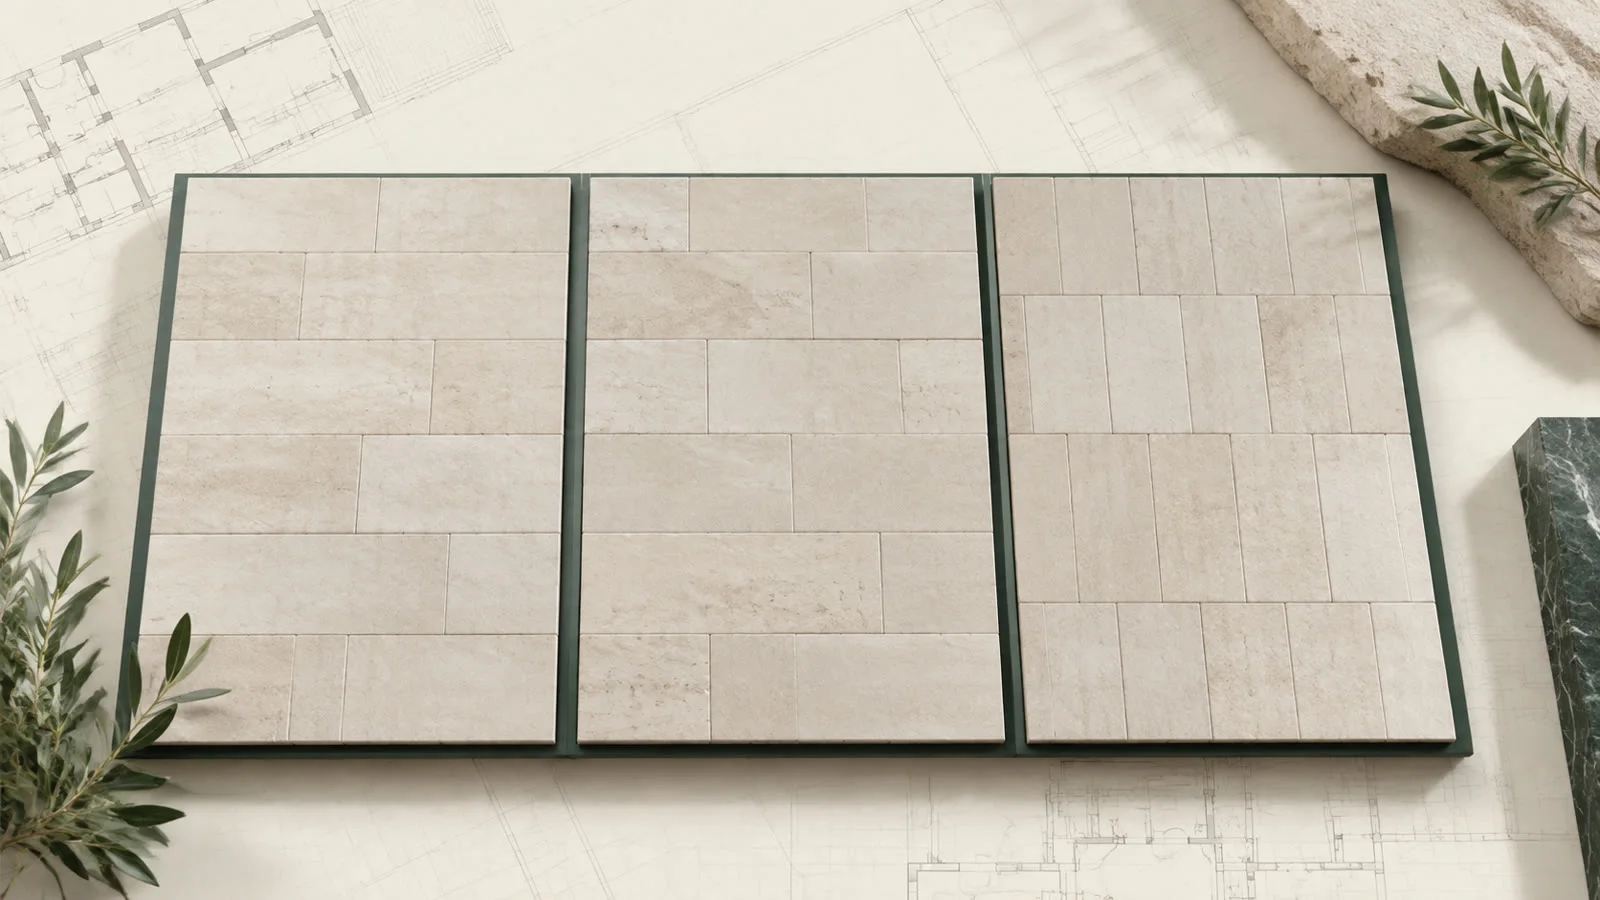
Half, third or quarter: offset changes more than appearance.
The offset determines where end joints land, how calm the surface looks and which cuts appear at the edges. With long ceramic tiles it also affects the risk of visible lippage. This guide explains the choice and shows how to test all three options in your own room.
The planning tool opens after free sign-up.
By the floorplanning.app editorial team
The short answer for beginners
A third offset is often the best starting point for long tiles: it looks lively, repeats clearly and avoids the critical 50% overlap of many slightly bowed tiles. Half offset is ordered and calm but demands flatter products and substrates. Quarter offset is subtler but creates more varied border cuts.

The three offsets at a glance
1/2 offset
Half offset
A strong brick-like pattern repeating every two rows.
- Calm and symmetrical
- Only two starting-piece lengths
- Check bowing with long tiles
1/3 offset
Third offset
Balanced joint pattern with a useful technical margin for many plank formats.
- Three-row repeat
- Less critical lippage alignment
- Good starting point for 20 × 120 and similar
1/4 offset
Quarter offset
Finely stepped end joints with a longer, less dominant repeat.
- Lively without randomness
- Four starting-piece lengths
- Inspect the edge sequence carefully
What matters in practice

Half offset: strong order and clear cross-lines
Every second row starts with half a tile. The pattern is easy to read and straightforward to control with consistent products. With long porcelain planks, however, the higher centre of one tile can meet the lower ends of adjacent tiles, making lippage more visible.

Third offset: the robust all-rounder
The starting point advances in three steps. This distributes end joints evenly without placing the centre of a long tile directly beside the end of its neighbour. For tiles longer than 15 inches, MAPEI’s summary of US industry guidance gives 33% as the maximum offset; some manufacturers require less.

Quarter offset: subtler movement, longer repeat
The offset is one quarter of the tile length and repeats after four rows. The joint pattern appears less blocky than half offset. At the edge, however, four recurring starting pieces replace two; in small rooms, inspect the full sequence on the actual floor plan.
Separate technical and visual decisions
Do not simply pick the prettiest preview. First eliminate any option the manufacturer does not approve or that creates problematic edge pieces. Then choose the desired appearance from the technically suitable layouts.
- Offset describes how end joints move from one row to the next
- Nominal tile size and joint determine the real grid spacing
- Long porcelain tiles can have slight manufacturing bow
- Raking light makes small height differences more visible
- More repeat stages create more distinct border cuts
- The lowest-waste pattern is not automatically the best-looking
- A sample panel shows colour, joints and lippage better than any rendering
How to choose the right offset
1. Find the product instruction
Check box, data sheet and manufacturer website for maximum offset, minimum joint and substrate requirements.
2. Check tiles for bowing
Place several pieces face to face. Even small deviations are a reason to scrutinise a 50% offset.
3. Set the room and main view
Draw the actual floor plan and decide whether long edges should follow light, room length or an important passage.
4. Create three options
Keep size, joint and direction unchanged. Change only the offset so you are not comparing several effects at once.
5. Compare edges and material
Record the narrowest border piece, cut count and total demand for each option. Pay special attention to recurring starting pieces.
6. Dry-lay a sample
Lay several rows with spacers and view them from the doorway and in side light. Approve the offset only after this check.
Check before making the final choice
- Installation recommendation on box or data sheet
- Check several tiles back-to-back for bowing
- Check substrate with a straightedge
- Joint width and calibre of the delivered batch
- Narrowest edge piece in all four directions
- End-joint sequence at doors and fixed units
- Dry-laid sample viewed in raking light
- Material quantity including actual cuts
Examples from the tool
This is what it looks like planned out
The numbers above do not come from a spreadsheet but from a real layout. You can open these example projects directly – floor plan, laying plan and material list, exactly as the tool outputs them.

Attic room with a slope
A five-sided outline instead of length × width: the slope is drawn as a real edge and the planks run lengthwise – every cut along the slope counted individually.
- 14.71 m² with an angled edge
- 128 × 19 cm plank, laid lengthwise
- 87 planks · 11 packs

Format comparison: 60 × 60 vs 30 × 60
Two identically sized rooms side by side, only the format differs – each with its own row in the material table. Here the smaller format needs more material, because room dimensions decide, not tile size alone.
- 2 × 13.49 m² · 8% reserve
- 60 × 60 → 46 tiles = 16.6 m²
- 30 × 60 → 98 tiles = 17.6 m²
Opens the read-only client view of a share – the same one you create for your own projects with Premium.
Common questions about offset patterns
What is the difference between half and third offset?
Half offset moves every second row by half a tile. Third offset advances in thirds and repeats after three rows. With long tiles, this reduces the direct meeting of tile centres and neighbouring ends.
Can 30 × 60 cm tiles be laid at half offset?
Size alone cannot answer this. Check the actual tile for bowing and read its installation instruction. Half offset can work with sufficiently flat products, but there is no blanket approval.
Which offset creates the least waste?
It depends on room dimensions, starting point and tile length. Any of the three can win in a particular room, so compare them on the same floor plan and direction.
What is a random offset?
End joints do not follow a fixed 1/2, 1/3 or 1/4 rhythm. Offcuts can start the next row if minimum stagger and product rules are met. It appears more natural but is harder to pre-plan exactly.
Does the 33% rule apply to laminate?
No. It concerns large ceramic tile and bowing. Laminate has separate minimum end-joint stagger requirements; follow the flooring product’s installation guide.
Related pattern guides
- Tile pattern calculatorUse a free tile layout planner to compare straight, diagonal, and herringbone patterns on your floor plan, including cuts, quantities, and waste.
- Create a complete tile layoutPlan a tile layout step by step: measure the room, set reference lines, check edge cuts, compare patterns, and order the right amount of material.
- Lay across or along a hallway?In a hallway the laying direction decides looks and waste. Numbers from 35 hallway cases plus a side-by-side comparison of both directions on the…
- Compare tile size and wasteEight formats, 500 rooms, the same room per run: 20×20 gets by with a median surplus of 0.3%, 60×120 needs 17.4%. The full comparison table.
Sources & technical references
Technical values can vary by product and build-up. When in doubt, the current installation instructions for the actual system always take precedence.
- Technical bulletin: installing wood-look porcelain plank tile
MAPEI Corporation
Manufacturer technical guidance on bowing, joint width, mortar coverage and the US industry maximum offset of 33% for large and heavy tile.
- Centred, balanced tile layouts and edge cuts
Ceramic Tile Education Foundation (CTEF)
Industry basis for balanced grids and avoiding unnecessarily narrow edge pieces.
Compare half, third and quarter offset live
Switch offsets, move the grid and see which option creates better border pieces and the right material quantity in your room.
The planning tool opens after free sign-up.