Tiling guide
Where does the cut row go? Which wall can take it
Some wall gets the cut row – you cannot plan it away, only move it. The question is which one. We counted across 500 rooms how wide that border row turns out: a median of 23.5 cm, a good half tile. But almost every third border row (30.9%) ends up narrower than a third of a tile, and in 249 of the 500 rooms – nearly every second one – at least one such critical strip appears. Knowing that in advance, you shift the grid by a few centimetres and the problem is gone. Noticing afterwards, you live with it.
The planning tool opens after free sign-up.
By the floorplanning.app editorial team
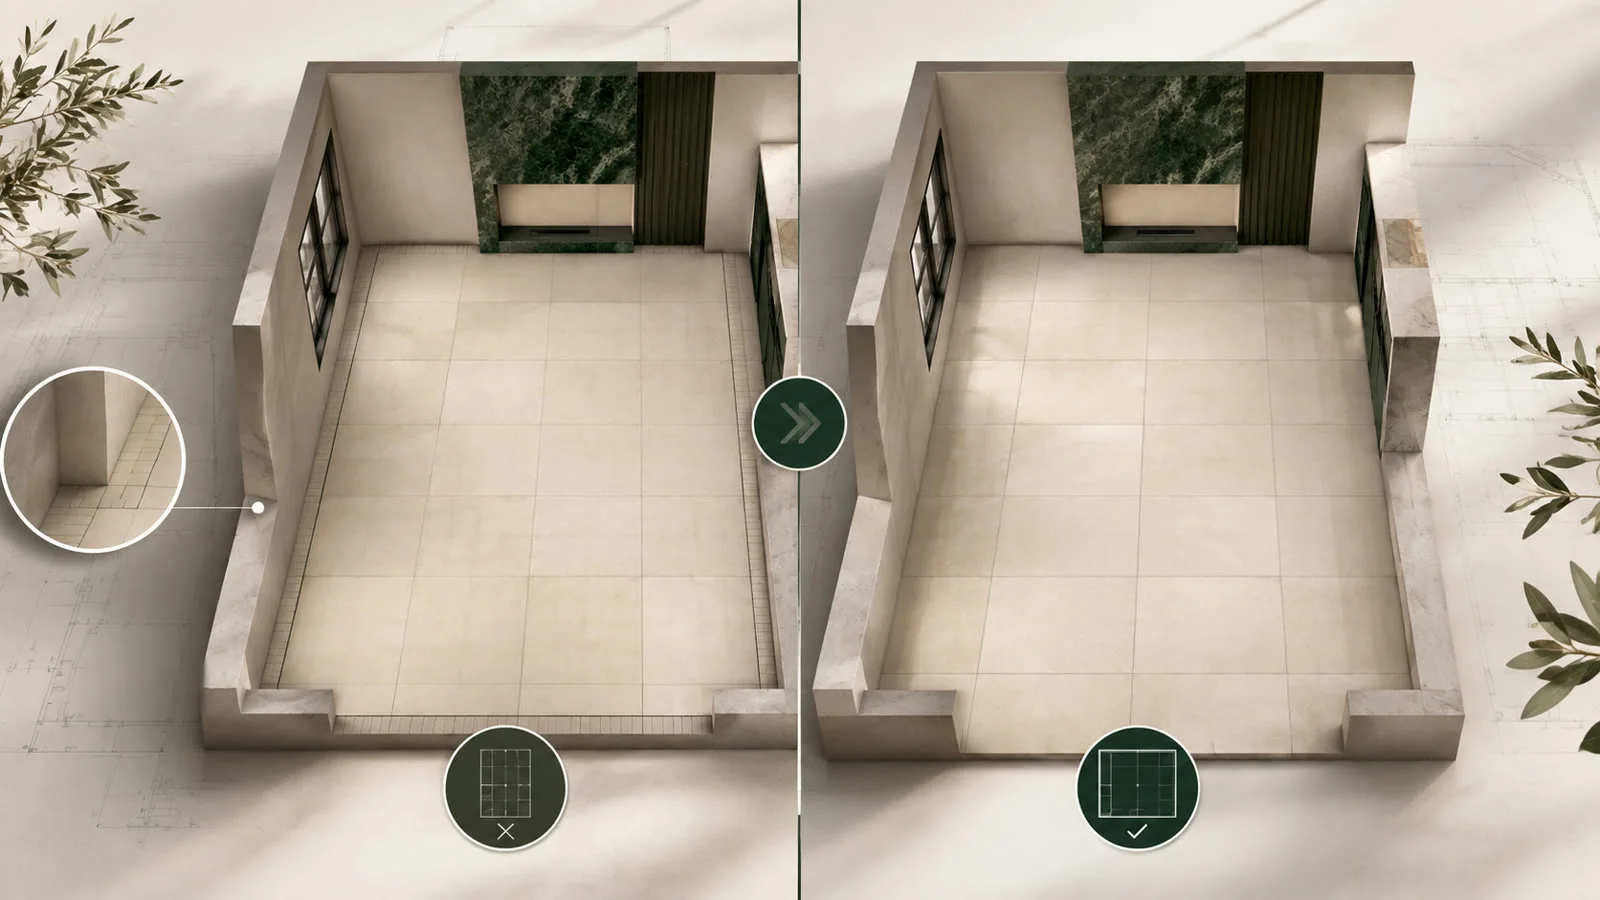
The 3 cm strip is not bad luck, it is arithmetic
Whether half a tile or a hairline strip remains is decided purely by the ratio of room size to grid size. 3.65 m of wall divided by a 60.3 cm grid gives 6.05 – six full tiles and three centimetres of remainder. Such strips break while cutting, soak up adhesive and catch every visitor’s eye. In our analysis every ninth border row (11.5%) was narrower than 5 cm.

What matters in practice

Halve the remainder instead of hiding it
The standard fix: shift the grid so the remainder is shared between both opposite walls. A 3 cm strip becomes two rows of 32 cm. In this example the material demand stays exactly the same – 35 tiles before and after, because seven columns and five rows are needed either way. What rises is the cutting work: 11 cuts become 20. Rule of thumb: if the border row gets narrower than a third of a tile, halve the remainder.
Which wall can take the cut
Forgiving walls are those where something will stand or hang later: the wall behind the bathtub, the kitchen run, the wardrobe wall, the side under the skirting. Unforgiving are the threshold, the wall opposite the door and every open area – in front of the shower, in front of the kitchen island. When in doubt: the cut belongs where you do not look on entering.
Special case: threshold and outside corner
Two spots forgive nothing: the threshold, where two coverings meet and every millimetre is visible, and the outside corner, where a cut tile is seen from two sides. Both get the full tile – even if that means more cutting elsewhere.

Shifting often costs nothing at all
The usual objection: “If I halve the remainder I need more tiles.” Often that is not true – the number of columns and rows stays the same, only their width changes. Whether that holds in your room is shown immediately by the result panel while you shift the grid. If the total stays put, the nicer variant costs you extra cuts only, not extra material.
Which wall takes which cut
The cut row is not a flaw but an allocation. All that matters is making it deliberately – before gluing, not after.
- Forgiving: behind the bathtub, kitchen run, wardrobe, under the skirting
- Unforgiving: threshold, wall opposite the door, open areas, outside corners
- Lower limit: a third of the tile width, at least 5 cm
- With two visible walls: halve the remainder instead of pushing it to one side
How to check the border rows
1. Place the grid
Enter room, format and joint and place the grid flush against a wall.
2. Read the border widths
Check in the plan which walls get cuts and how wide they turn out.
3. Correct the offset
Shift the grid until the cut sits on the least conspicuous wall.
Examples from the tool
This is what it looks like planned out
The numbers above do not come from a spreadsheet but from a real layout. You can open these example projects directly – floor plan, laying plan and material list, exactly as the tool outputs them.

Small bathroom with tub and stud wall
Under 3 m² of floor left, but two cutouts: this room produces more cut tiles than full ones – exactly where the m² rule of thumb fails.
- 2.82 m² · 30 × 60 · 2 mm joint
- 9 full tiles, 22 cuts
- 35 tiles incl. 10% reserve

Attic room with a slope
A five-sided outline instead of length × width: the slope is drawn as a real edge and the planks run lengthwise – every cut along the slope counted individually.
- 14.71 m² with an angled edge
- 128 × 19 cm plank, laid lengthwise
- 87 planks · 11 packs
Opens the read-only client view of a share – the same one you create for your own projects with Premium.
Common questions
How narrow may a cut tile row be?
The guideline is a third of the tile width, but at least 5 cm. With a 60 cm tile that is around 20 cm. Narrower strips break more easily while cutting, bond less well in the adhesive bed and look like a planning mistake – because usually they are one.
Which wall should the cut row sit on?
The least conspicuous one: behind the bathtub, kitchen run or wardrobe, under the skirting, on the wall behind the door. Open areas, the wall opposite the door and the threshold get the full tile.
Does splitting the remainder across both sides cost more material?
Often not. In many rooms the number of rows stays the same, only their width changes. It only gets more expensive if the shift forces an additional row to be cut. On the floor plan you see both variants with quantities side by side.
What if both opposite walls are visible?
Then the symmetrical solution is the right one: halve the remainder, both border rows equally wide. That is exactly the case where the centred start pays off – even if it needs slightly more material on average.
Does this apply to laminate and vinyl too?
Yes, with one addition: with click systems a too-narrow last row is not only visually awkward but technical – narrow strips hold the locking mechanism poorly. The same guidelines apply, and the first row is cut narrower accordingly.
Read on
- Centre or wall: where do you start?Centre or wall edge? The axis decides symmetry and material demand. Analysis of 500 rooms plus a live comparison of both starting points on the floor…
- Thresholds: where do you break the pattern?Continuous grid or a clean break in the doorway? When a shared grid across rooms pays off and how to check it on the floor plan first.
- Calculate offcuts when laying tilesCalculate offcuts and waste when laying floors: count cuts individually, derive waste in m² and total demand including reserve transparently.
Make edge zones visible on your own floor plan
Create your room, enter the format and shift the grid – the cut rows are immediately visible in the plan.
The planning tool opens after free sign-up.