Heating guide
Laying tiles on underfloor heating
Tiles and underfloor heating are a good team: tiles conduct heat well and store it for a long time. But the build-up, expansion joints and the right adhesive decide whether the floor lasts. We show what really matters.
The planning tool opens after free sign-up.
By the floorplanning.app editorial team
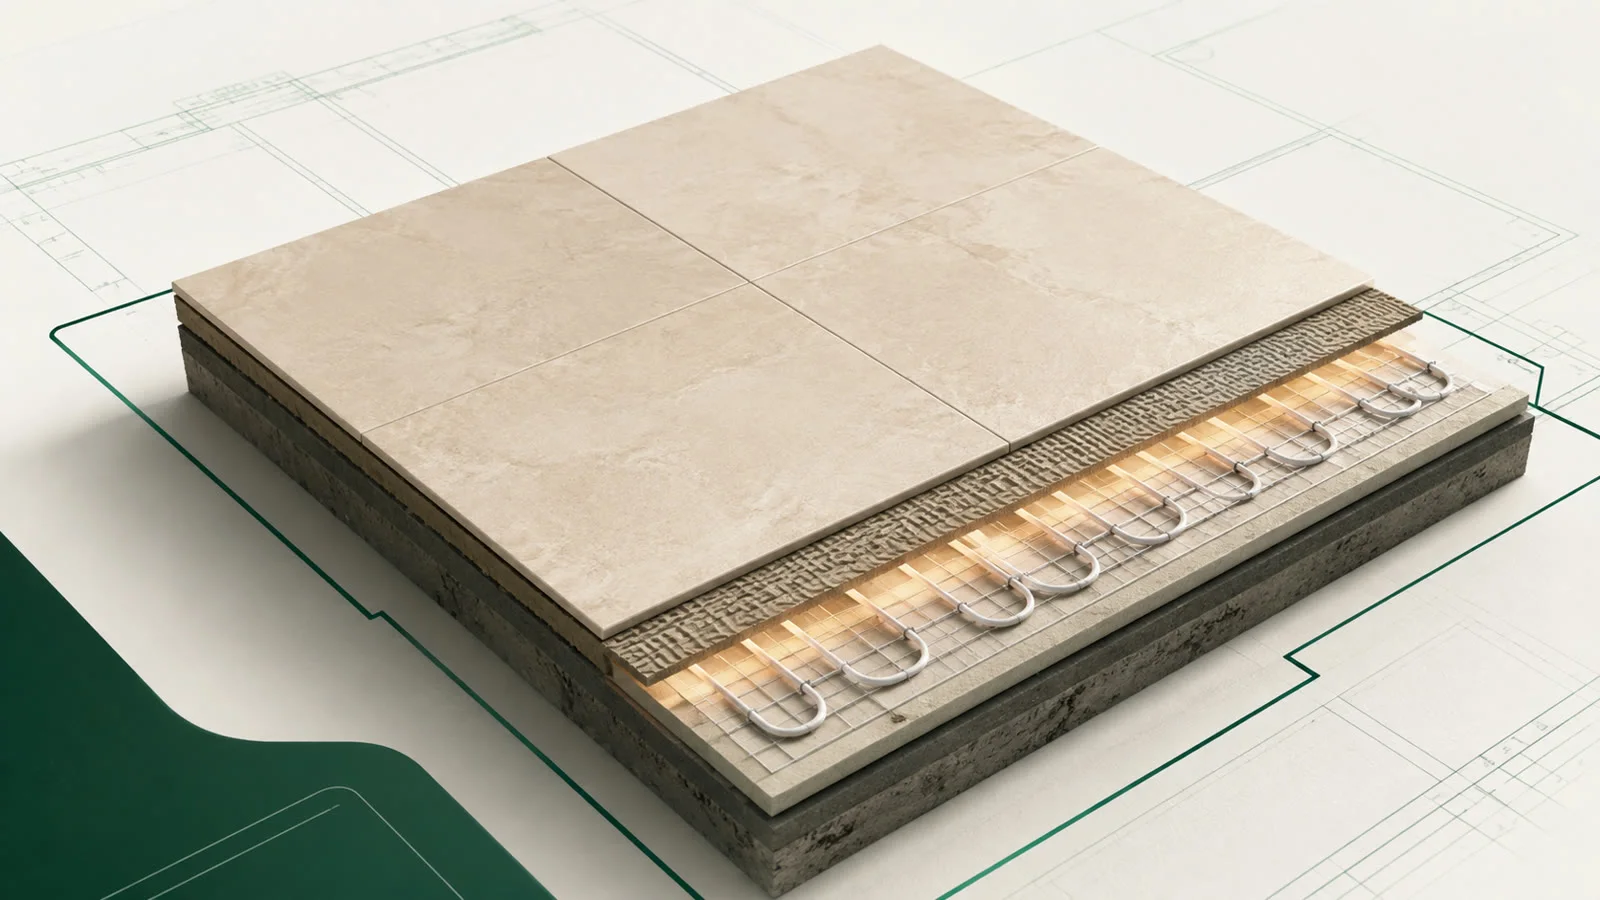
Build-up height: every millimetre counts
Underfloor heating eats height: heating pipes, screed, adhesive and tile quickly add up to 8–12 cm. Plan the build-up before installing doors, otherwise they will not fit in the frame later.

What matters in practice

Expansion joints are mandatory
Tiles expand when heated. Without movement joints the covering cracks. Rule of thumb: one expansion joint every 8 m of room length or 40 m² of area, closer with underfloor heating. The joints in screed and tile covering must line up.

Flexible adhesive and slow heating phase
Not every tile adhesive tolerates constant temperature changes. Use a flexible adhesive approved for underfloor heating. After grouting heat up slowly: maximum 5 °C per day, never from cold.

Format choice affects heat conduction
Large-format tiles have fewer joints and conduct heat slightly better, but tile thickness matters more than format. More important is that the format fits the dimensions well and produces little waste.

Material demand with reserve
Plan 10–15% reserve – not only for breakage, but also for later repairs where you need the same batch.
Checklist: tiles on underfloor heating
So that the heated floor lasts and heats evenly.
- Clarify build-up height before door installation
- Plan expansion joints per manufacturer and screed specifications
- Use flexible adhesive suitable for heated floors
- Choose format with low waste
- Plan 10–15% reserve
How to plan heated floors
1. Check heating system and screed data
Ask for build-up height, heat output and screed drying phase.
2. Align build-up height with doors and skirting
Shorten doors before tiling or order new doors to fit.
3. Test tile format and joint width in the tool
Compare waste and cuts for different formats.
4. Draw expansion joints into the floor plan
Mark joint positions so they are cut correctly later.
5. Order material including reserve
Quantity including 10–15% reserve for breakage and repairs.
Examples from the tool
This is what it looks like planned out
The numbers above do not come from a spreadsheet but from a real layout. You can open these example projects directly – floor plan, laying plan and material list, exactly as the tool outputs them.
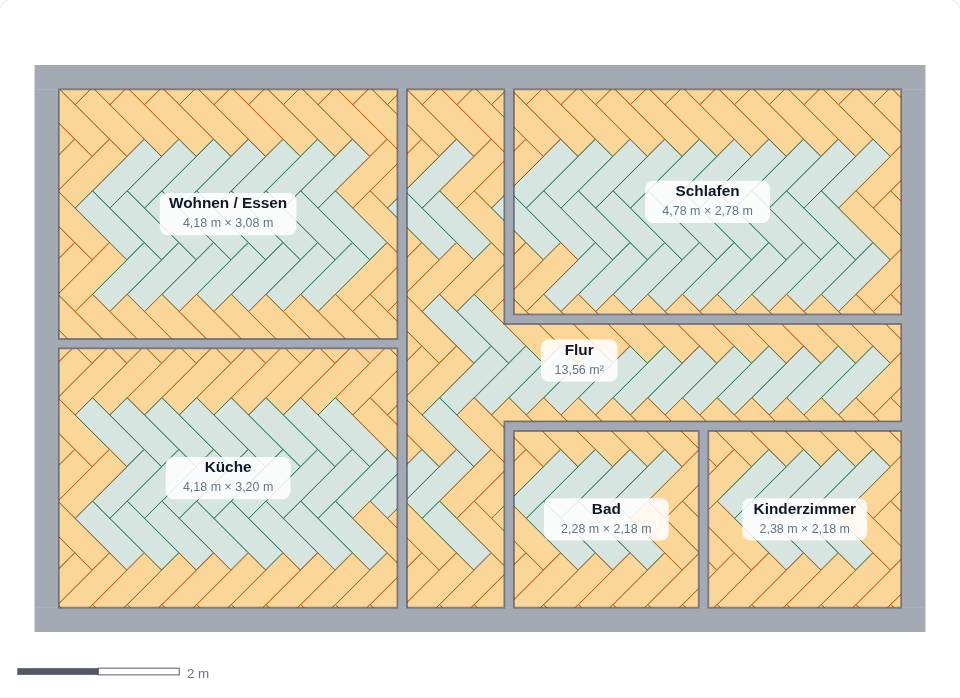
Flat with underfloor heating
Several rooms with one continuous tile layout – an example of planning room transitions, movement joints and material quantities together.
- 63.79 m² across 6 rooms
- 60 × 60 · 3 mm joint
- 10% reserve for material planning

Three-room flat, one grid
Six rooms, eleven walls, five doorways – and a single herringbone grid running through every opening. Material is calculated for the whole flat at once.
- 63.79 m² across 6 rooms
- 90 × 30 herringbone, one grid
- 334 planks · 199 cuts
Opens the read-only client view of a share – the same one you create for your own projects with Premium.
Common questions
Can I lay any tile on underfloor heating?
Yes, but porcelain stoneware and natural stone are especially suitable. Wood-effect ceramic tiles too. Pay attention to thermal conductivity and breaking strength.
How thick may the adhesive be?
The adhesive bed should suit the tile size, usually 3–6 mm after notching. Too thick insulates, too thin does not bond.
Do I need impact sound insulation?
Usually not with screed underfloor heating; it can be useful with dry-build systems. Clarify with the heating installer before choosing tiles.
When can I turn on the heating?
After at least 14 days, then heat up slowly – maximum 5 °C per day. Never heat up abruptly from cold.
Does underfloor heating change waste?
No, the heating itself does not. But movement joints can reduce the usable area, which in turn affects the tile count.
Related calculators & guides
- Laying tiles: where do you start?Centre or wall edge? The axis decides symmetry and material demand. Analysis of 500 rooms plus a live comparison of both starting points on the floor…
- Calculate tile material demandCalculate tile quantities accurately, including full tiles, cuts, waste, and reserve, and get a reliable material list for purchasing.
- Large or small format?Eight formats, 500 rooms, the same room per run: 20×20 gets by with a median surplus of 0.3%, 60×120 needs 17.4%. The full comparison table.
Plan tiles for heated floors
Create your room, pick a format and check the layout with joints and cuts directly on the floor plan.
The planning tool opens after free sign-up.