Bathroom guide
Tiling a shower: slope, drain and sealing
A walk-in shower looks good and is barrier-free – but it demands planning. The slope must run to the channel or point drain, the waterproofing must connect cleanly and the material must be slip-resistant.
The planning tool opens after free sign-up.
By the floorplanning.app editorial team
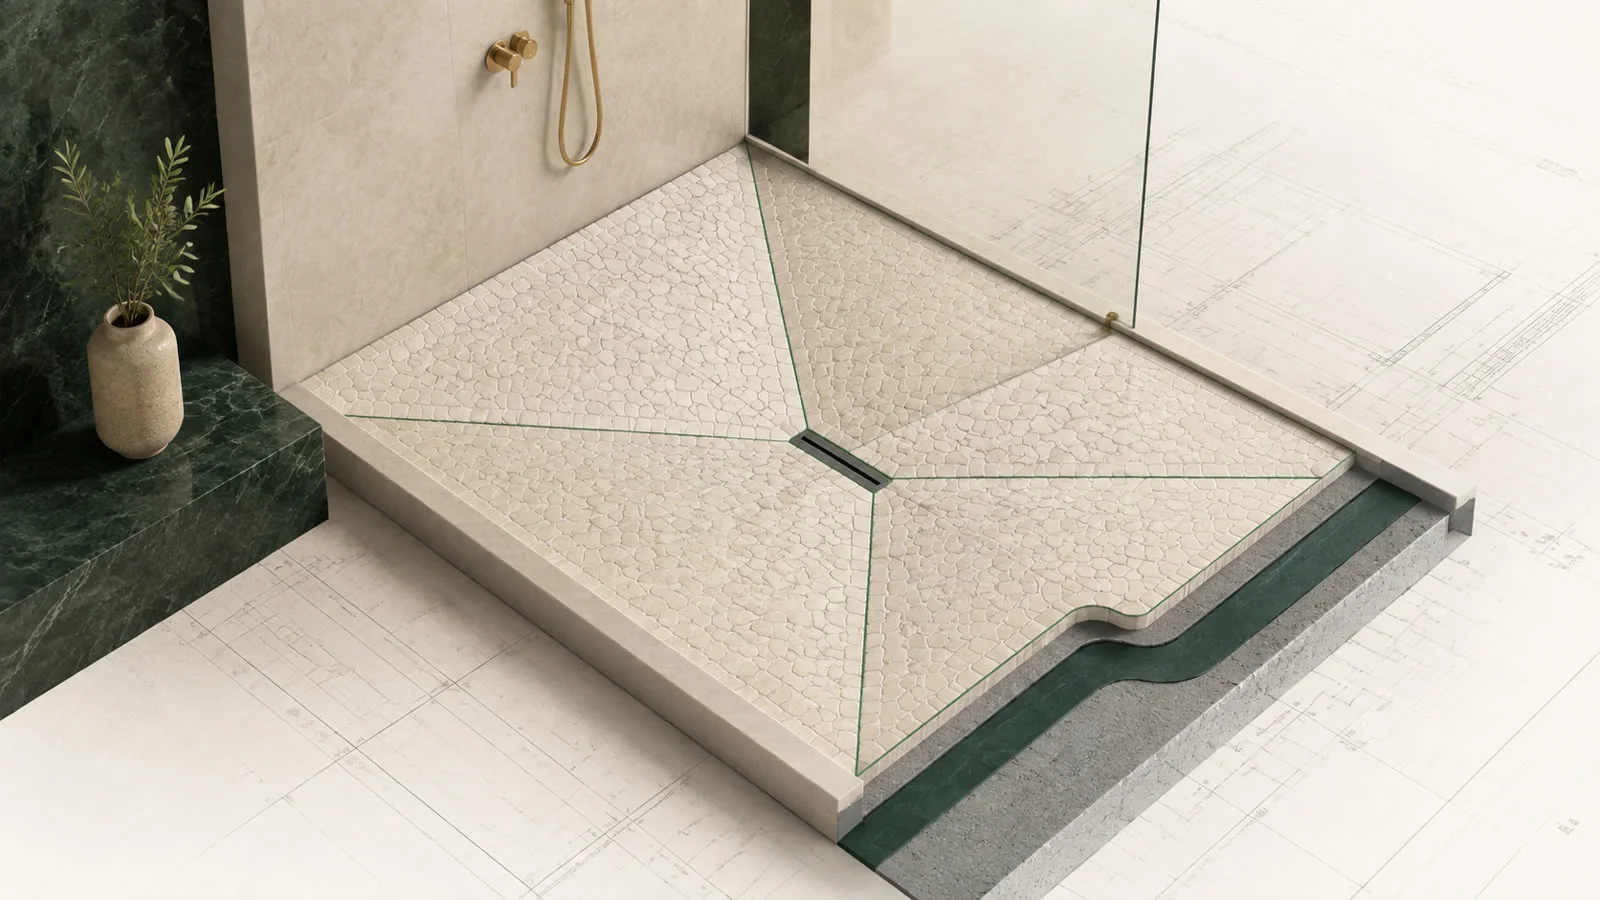
Slope: 1–2% to the drain channel
Water must drain without puddles. For point drains you need about 2% slope in all directions, for a channel drain 1–1.5% across it is enough. Small-format tiles or mosaic form this more cleanly than large-format.

What matters in practice

Point drain or channel drain?
Point drains are cheaper but require slope in four directions – demanding with large formats. Channel drains can be installed flatter and suit long showers. Both need clean waterproofing.

Mosaic: small, safe, flexible
Mosaic tiles are often used in showers because they adapt better to the slope and offer higher slip resistance. Small formats such as 10×10 cm or 5×5 cm are more suitable than 60×60 cm.

Plan material with high reserve
In the shower many cuts arise around the drain, corners and wall connections. Allow at least 15% reserve, better 20%. In the tool you see every cut and can set the reserve precisely.

Small bathroom, many cuts
A 4.8 m² bathroom with 60×60 quickly has 50% cuts. The tool shows the exact tile count and helps size the reserve correctly.
Shower planning checklist
From drain to slip class: what to clarify before buying.
- Choose channel drain or point drain
- Plan 1–2% slope
- Install waterproofing membrane or liquid seal
- Choose slip-resistant tiles (R10+)
- Allow 15–20% reserve
How to tile a shower
1. Set shower dimensions and drain position
Enter length, width and channel/point drain in the floor plan.
2. Plan tile format and slope
Choose small formats or mosaic, ensure slope to drain opening.
3. Install waterproofing and drain
Apply membrane or liquid seal and connect the drain.
4. Cut and lay tiles
Cut cleanly around drain and corners, work away from the channel.
5. Apply grout and silicone
Work in grout, remove excess, silicone at wall connections.
Examples from the tool
This is what it looks like planned out
The numbers above do not come from a spreadsheet but from a real layout. You can open these example projects directly – floor plan, laying plan and material list, exactly as the tool outputs them.
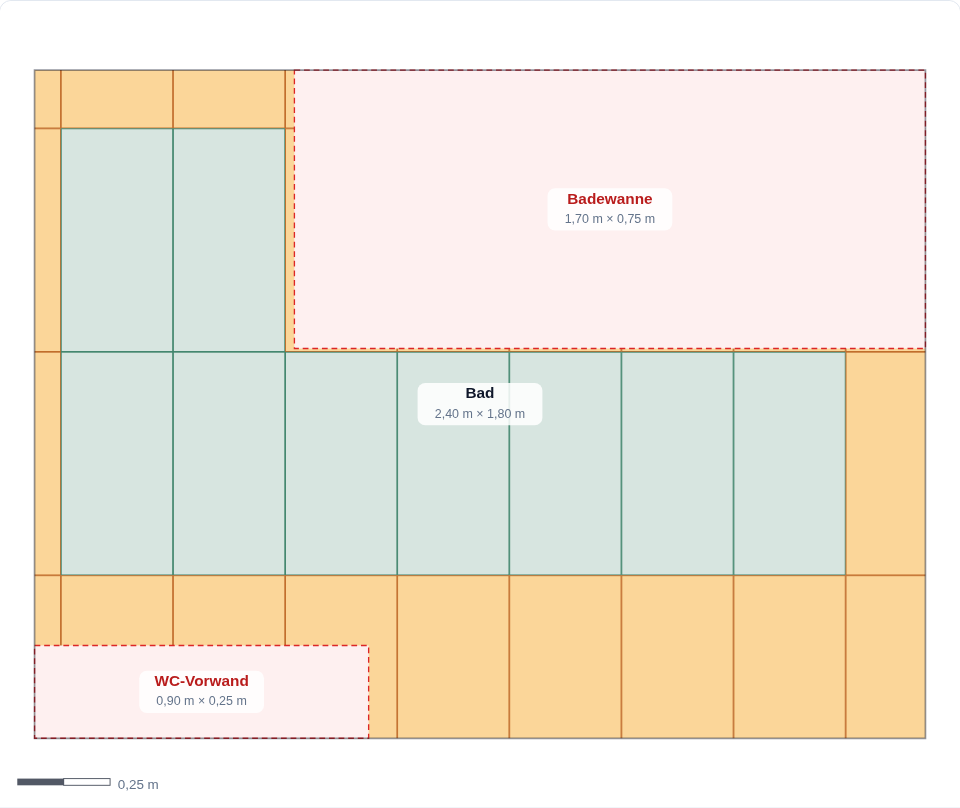
Walk-in shower with linear drain
A tiled bathroom with a shower area, linear drain and stud wall – the plan shows where slope, edge cuts and waterproofing meet.
- 7.68 m² · 30 × 60 · 2 mm joint
- Shower area 1.20 × 2.40 m
- Linear drain and stud wall planned

Small bathroom with tub and stud wall
Under 3 m² of floor left, but two cutouts: this room produces more cut tiles than full ones – exactly where the m² rule of thumb fails.
- 2.82 m² · 30 × 60 · 2 mm joint
- 9 full tiles, 22 cuts
- 35 tiles incl. 10% reserve
Opens the read-only client view of a share – the same one you create for your own projects with Premium.
Common questions
What slope does a shower need?
At least 1%, better 2%, so water drains quickly and no puddles remain.
Can I lay large format in the shower?
Only to a limited extent, because the slope in four directions is hard to form. Mosaic or small formats are easier and safer.
Do I have to seal the shower with foam?
No, a waterproofing membrane or liquid sealant under the tiles is the standard. Silicone joints at the wall connections supplement the protection.
How much reserve do I need in the shower?
At least 15%, because many cuts arise around the drain and corners. For complex shapes allow 20%.
Which tiles are slip-resistant?
Slip class R10 or higher is recommended for private showers, R11/R12 in public areas.
Related calculators & guides
- Small bathroom: which format?Which tile size makes a small bathroom look bigger? Compare large and small formats, layouts, cuts, and waste directly on the floor plan.
- Laying tiles: where do you start?Centre or wall edge? The axis decides symmetry and material demand. Analysis of 500 rooms plus a live comparison of both starting points on the floor…
- Calculate tile material demandCalculate tile quantities accurately, including full tiles, cuts, waste, and reserve, and get a reliable material list for purchasing.
Plan the shower floor on the layout
Enter dimensions, draw the drain as a cutout and check the slope and material demand directly in the tool.
The planning tool opens after free sign-up.