Herringbone guide
Laying herringbone: which corner do I start in?
The short answer: you do not start in a random corner – you first define the room axis. From there you work symmetrically outward so the cuts at opposite walls end up the same size. floorplanning.app shows the layout live on your floor plan – you immediately see where full tiles and cuts land, and you can pick the starting corner or grid offset so the cuts sit where they are least visible.
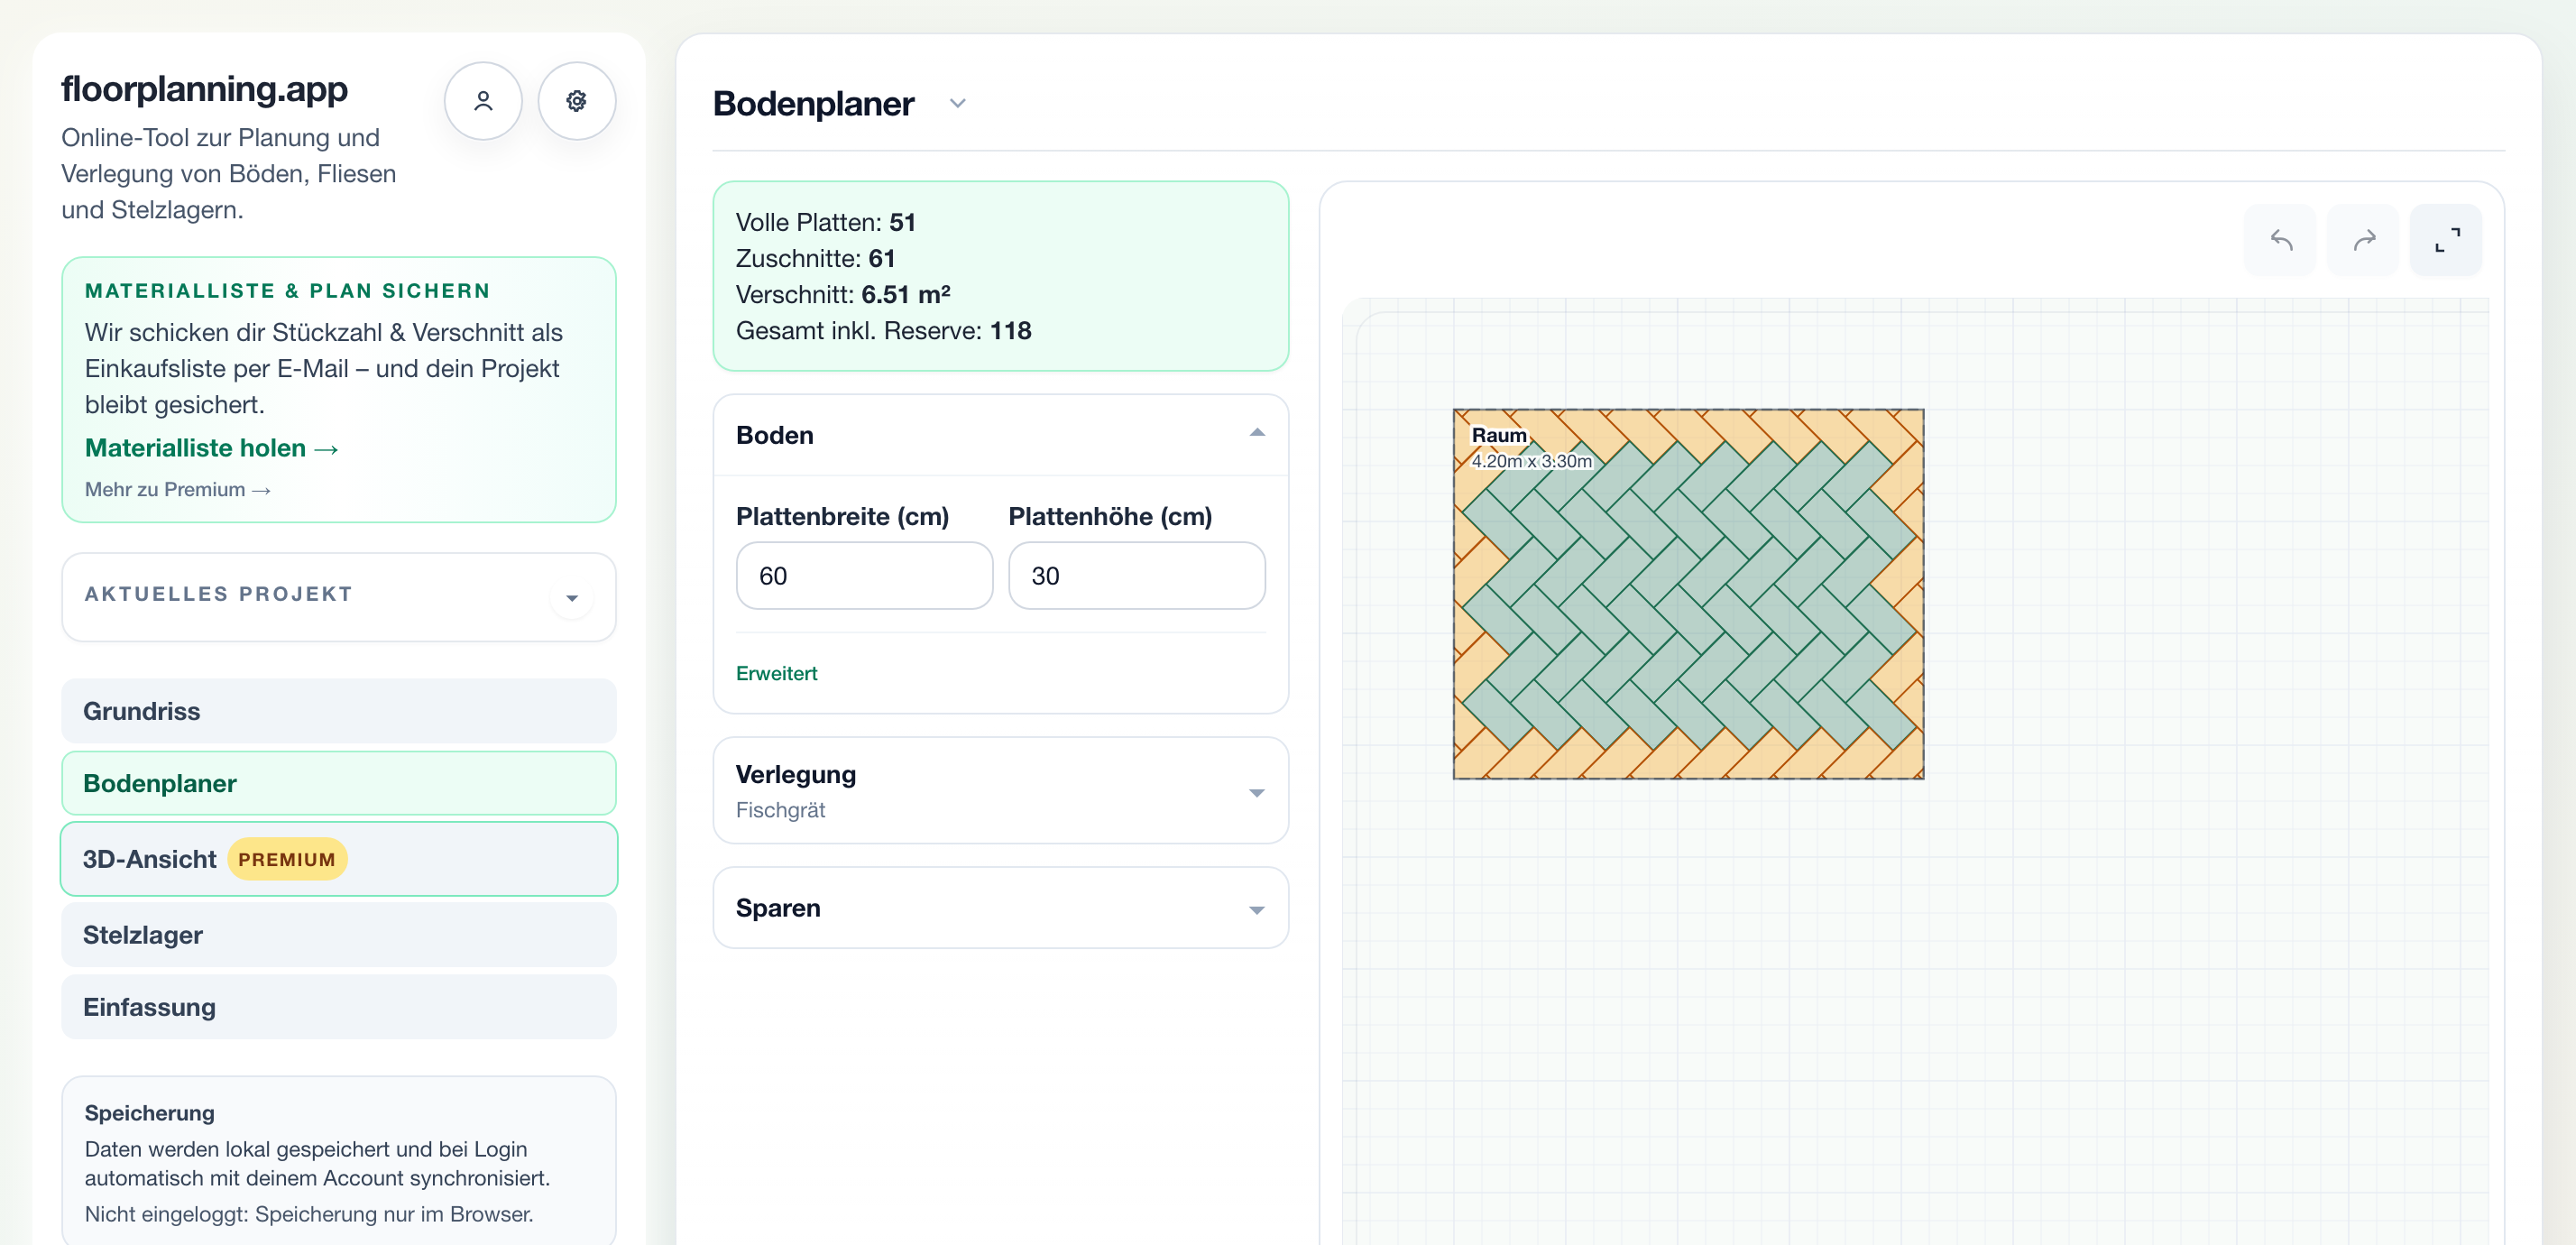
Axis first, corner second
With herringbone the look is defined by the axis, not the corner: the V-shape should sit centred and straight in view – usually parallel to the longest wall or the sight line from the door. Once the axis is set, the “starting corner” is just the point where you physically begin. In the tool you shift the grid offset and rotate the pattern until the border strips on both sides are as even as possible and never razor-thin.
What matters in practice
Push cuts to the inconspicuous wall
Deliberately plan the narrow cuts against the wall that will later sit behind furniture, on the door side or in shadow. The full, uncut row belongs on the sight axis as you enter the room. Because you see every strip on the floor plan, you decide this before the first cut – not on your knees in the mortar bed.
Dry run digitally instead of with real tiles
Pros lay herringbone out “dry” before bonding to check the axis and the starting cut. The digital floor plan does exactly that for you: change format, joint or rotation and the pattern recalculates – without touching a single tile.
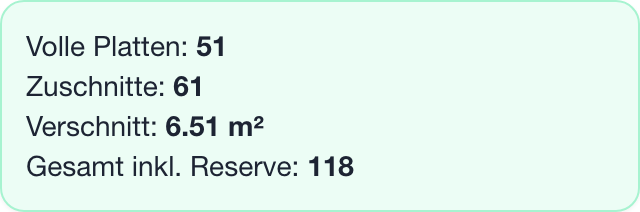
Full tiles and cuts at a glance
Once axis and start are set, you read off directly how many full tiles and how many cuts your herringbone layout produces – including waste in m² and total demand with reserve. The question “where to start?” turns into a reliable order quantity.
Why the starting question shapes the whole layout
With herringbone every cutting mistake stands out because the pattern guides the eye. Defining axis and start on the floor plan beforehand avoids crooked lines and tiny edge pieces – and saves you from prising up freshly bonded tiles.
- Centre axis first, corner second
- Keep edge cuts equal left and right
- Push narrow cuts to the inconspicuous wall
- Check the format works for herringbone
How to find the starting point
1. Add room & format
Capture the layout and pick a rectangular format.
2. Set herringbone & axis
Enable the pattern, rotate it and place the axis along the sight line.
3. Fine-tune offset
Shift the grid offset so the border strips are equal.
Common questions
Which corner is best to start herringbone?
Not in a corner but on the centre axis. Place the axis centrally along the main sight line and work symmetrically outward. Which physical corner you lay first is secondary – what matters is that the edge cuts left and right stay equal.
How do I avoid razor-thin cuts at the wall?
Shift the grid offset until no border strip is smaller than roughly a half to a third of the tile width. On the floor plan you see the effect instantly and can move the axis by a few centimetres instead of noticing it on site.
Which format do I need for herringbone?
Herringbone needs rectangular formats, classically in a 2:1 or 3:1 ratio – for example 60 × 30 cm, 75 × 25 cm or 90 × 15 cm. The tool checks the format and only enables herringbone once it fits.
Related calculators & guides
Plan your herringbone start now
Create your room, switch to herringbone and find axis and start directly on the floor plan.