Herringbone guide
Herringbone across multiple rooms: how do I plan the direction?
Across several rooms one continuous axis decides the overall look: if the pattern runs through doorways without a jump, the area feels larger and calmer. The challenge – every room has different walls – is solved by planning all areas in one floor plan and laying a shared grid across them. floorplanning.app computes the herringbone across all rooms and shows in a single image where cuts and transitions occur.
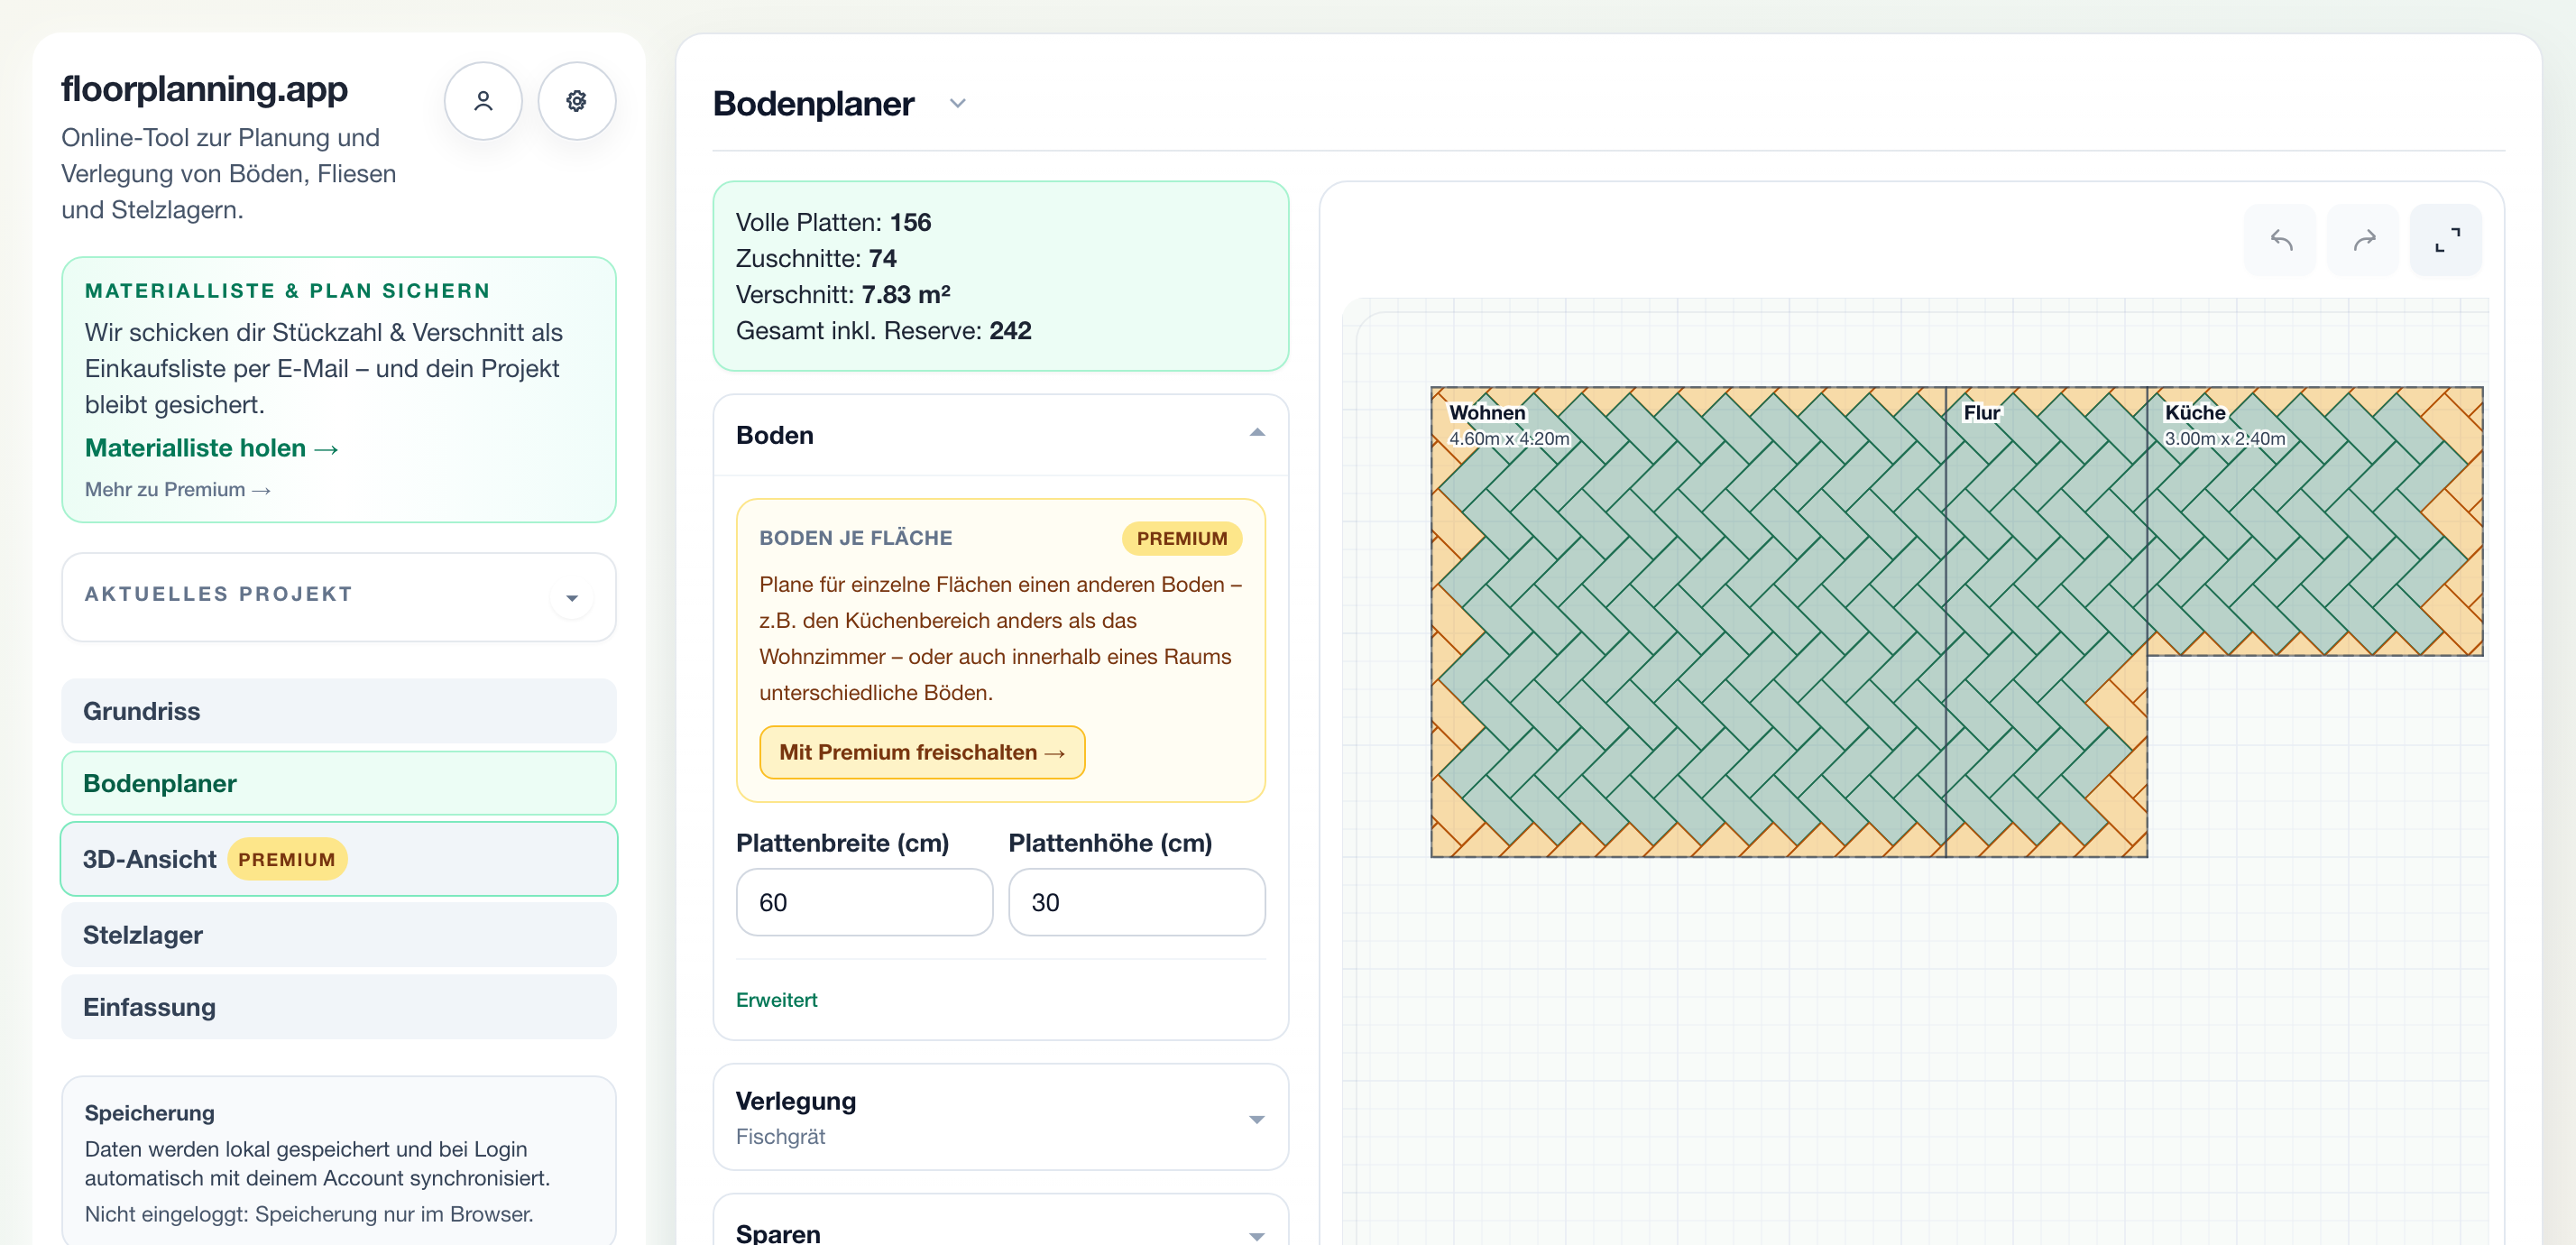
One grid for all rooms
The most common mistake is starting each room separately – then the pattern meets offset at the threshold. Instead, plan the living area, hallway and adjoining rooms as one connected surface with a shared origin. The pattern then visually runs unbroken through the doorways.
What matters in practice
Align direction to light and main path
Best align the running direction of the herringbone to the longest sight line or the main path through the home – often away from the entrance door. In long hallways an axis along the walking direction stretches the space further. You can rotate both variants in the tool and compare them directly before committing.
Check door transitions in advance
Doorways decide whether the pattern “continues”. On the floor plan you see which tile sits exactly in the threshold and whether it produces a clean cut or an ugly sliver – and you can nudge the grid by a few centimetres so the transition lands well.

Total quantity across all rooms combined
Instead of adding each room separately, you get one consolidated quantity for the entire connected surface – full tiles, cuts, waste and total demand including reserve. This avoids double purchases and shortages exactly at the door transitions.
What makes a continuous multi-room layout work
The calm, generous impression of a continuous layout only appears when all rooms share one grid. Planning room by room makes the lines meet offset at the doors. A shared floor plan solves this before the first bucket of adhesive.
- Plan all areas in one project
- Shared grid origin across doorways
- Align direction to main path and light
- Check door transitions before laying
How to plan multiple rooms
1. Create areas together
Capture living area, hallway and rooms as one connected surface.
2. Choose direction
Rotate the herringbone axis and align it to the main sight line.
3. Check transitions
Inspect cuts at thresholds and adjust the grid.
Common questions
Should herringbone be aligned the same in every room?
In open, visible layouts yes – one continuous axis looks calmest. For clearly separated rooms behind closed doors you can deliberately choose the direction per room. On the floor plan you see both options before deciding.
How do I prevent an offset at the threshold?
Plan the rooms with a shared grid origin instead of individually. Then the pattern shares one line and runs through the door without a jump. The tool lays the grid across all areas at once.
Can I calculate material demand for all rooms together?
Yes. All areas of a project are evaluated together, so you get one total quantity including reserve – without adding rooms by hand.
Related calculators & guides
Plan multiple rooms now
Create all areas in one floor plan and align the herringbone continuously.